

Enable Cluster Autoscaler in EKS with easy steps
Seven steps process to enable cluster autoscaler in EKS


Kubernetes offers human intervention free function to scale up or down the resources to meet the changing demands. Cloud Autoscaler is an EKS supported feature to enable on any existing cluster.
Prerequisites
- An existing Amazon EKS cluster
- Access to Kubeconfig file
- Kubectl and AWS Cli
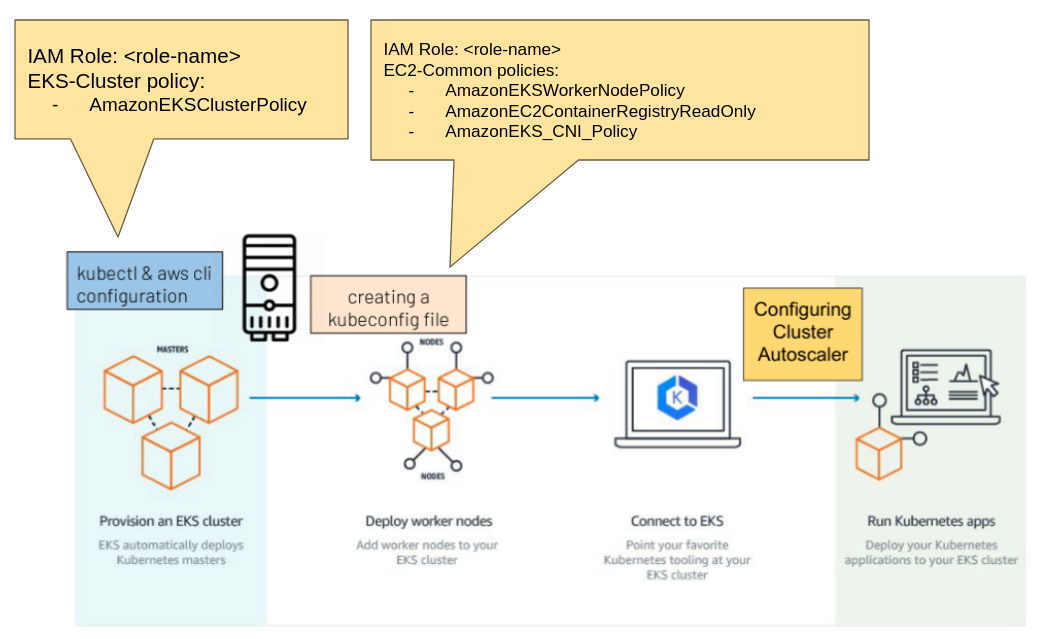
Right now the applied IAM roles in your cluster and nodes would be looking like this. We will be adding new IAM policy in our IAM role on the nodes.
Configuring Cluster Autoscaler
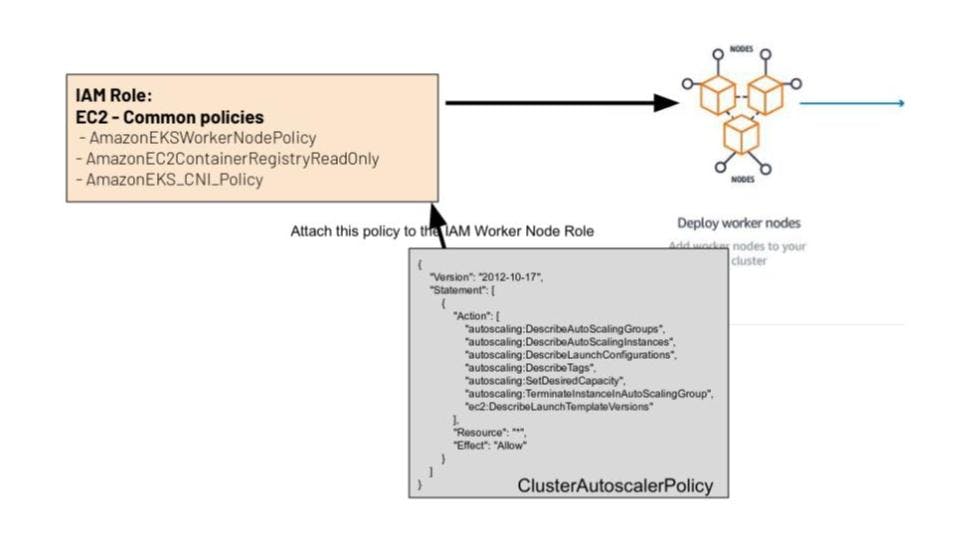
- Create a policy with following content. You can name it as ClusterAutoscalerPolicy.
{
    "Version": "2012-10-17",
    "Statement": [
        {
            "Action": [
                "autoscaling:DescribeAutoScalingGroups",
                "autoscaling:DescribeAutoScalingInstances",
                "autoscaling:DescribeLaunchConfigurations",
                "autoscaling:DescribeTags",
                "autoscaling:SetDesiredCapacity",
                "autoscaling:TerminateInstanceInAutoScalingGroup",
                "ec2:DescribeLaunchTemplateVersions"
            ],
            "Resource": "*",
            "Effect": "Allow"
        }
    ]
}
- Attach this policy to the IAM Worker Node Role which is already in use.
- Deploy the
Cluster Autoscalerwith the following command.
kubectl apply -f https://raw.githubusercontent.com/kubernetes/autoscaler/master/cluster-autoscaler/cloudprovider/aws/examples/cluster-autoscaler-autodiscover.yaml
Add an annotation to the deployment with the following command.
kubectl -n kube-system annotate deployment.apps/cluster-autoscaler cluster-autoscaler.kubernetes.io/safe-to-evict="false"Edit the Cluster Autoscaler deployment with the following command.
kubectl -n kube-system edit deployment.apps/cluster-autoscalerThis command will open the yaml file for your editting. Replace value with your own cluster name, and add the following command option
--skip-nodes-with-system-pods=falseto the command section undercontainersunderspec. Save and exit the file by pressing:wq. The changes will be applied.Find an appropriate version of your cluster autoscaler in the link. The version number should start with version number of the cluster Kubernetes version. For example, if you have selected the Kubernetes version 1.17, you should find something like
1.17.x.Then, in the following command, set the Cluster Autoscaler image tag as that version you have found in the previous step.
kubectl -n kube-system set image deployment.apps/cluster-autoscaler cluster-autoscaler=us.gcr.io/k8s-artifacts-prod/autoscaling/cluster-autoscaler:<YOUR-VERSION-HERE>
Conclusion
The Kubernetes Cluster Autoscaler is an easy to use function to prevent downtime when pods fail or are rescheduled onto other nodes by adjusting the number of nodes. This is typically already installed as a Deployment in an EKS cluster. Basic familiarity can save extensive human resources.